Line art drawing is a specialized service of the vector design and illustration industry. Draw a line art in Illustrator is a kind of magic. Auto-tracing is not sufficient to vectorize any image. So, what is the manual process, and how does it work?
Line Art Drawing
In this blog, our experts reveal the process of line artwork drawing. They have created this blog to answer your question- about how to draw line art. Here, they use one of the prominent design software Adobe Illustrator CC. Let’s explore-
Step 1: Open an artwork
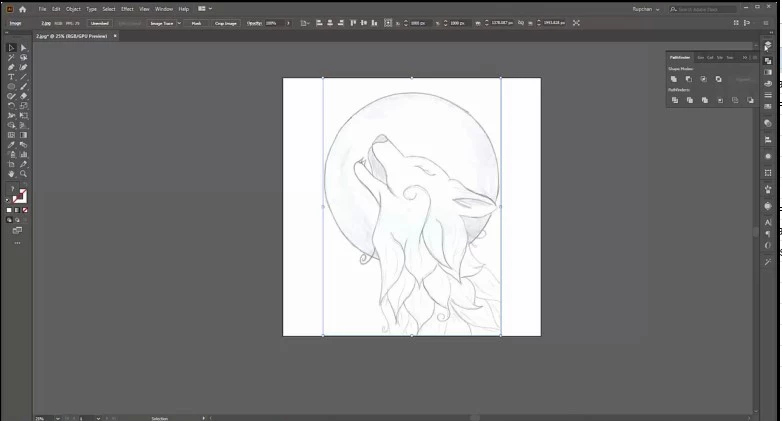
First, Select an artwork. Open it on the artboard of Adobe Illustrator CC.
Step 2: Customize Layer and Stroke
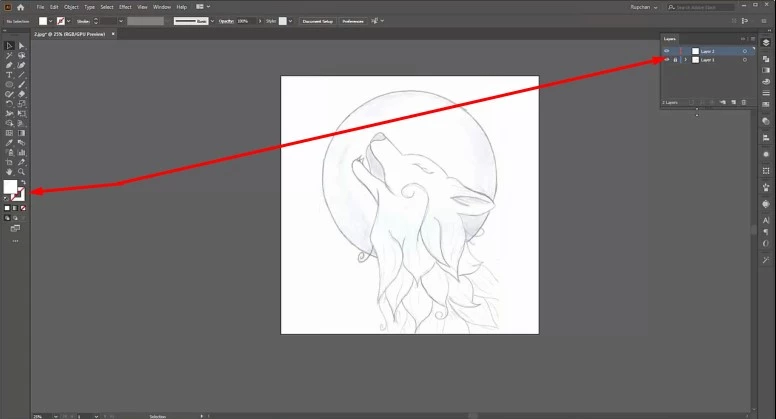
Before starting the path drawing we need to customize the Layer and Stroke. Lock the existing layer. Open a new layer. Select stroke and lock fill color.
Step3: Start with the Ellipse Tool
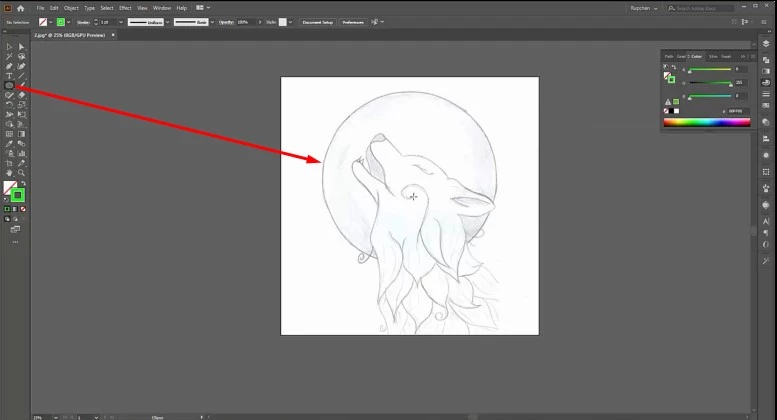
The artwork we choose for line drawing has a circle shape. We start our drawing with this shape. To do that we use the Ellipse Tool.
Step 4: Use of Pen Tool
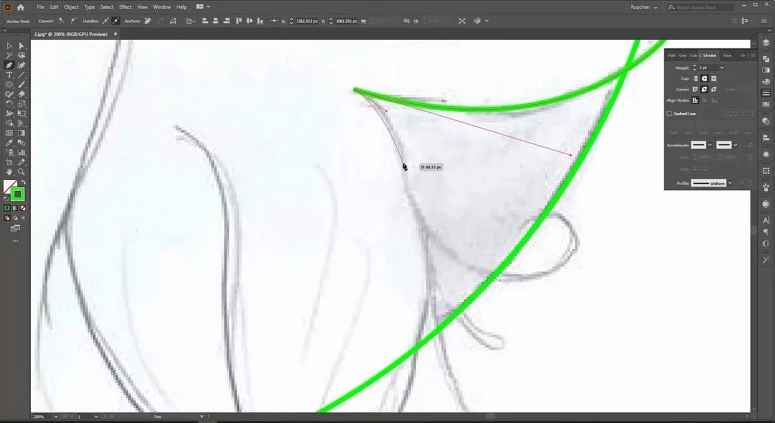
Pen Tool always plays a good role in line art drawing. We use the tool here also. Keep patience and take time to draw the line. The Pen Tool can be selected manually or even by pressing ‘P’.
Step 5: Group and expand
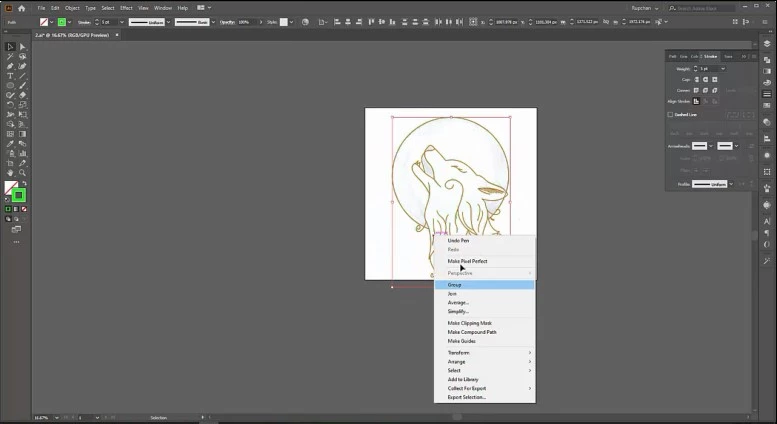
After completing the path drawing, group the entire portion of the path and expand it.
Step 6: The end
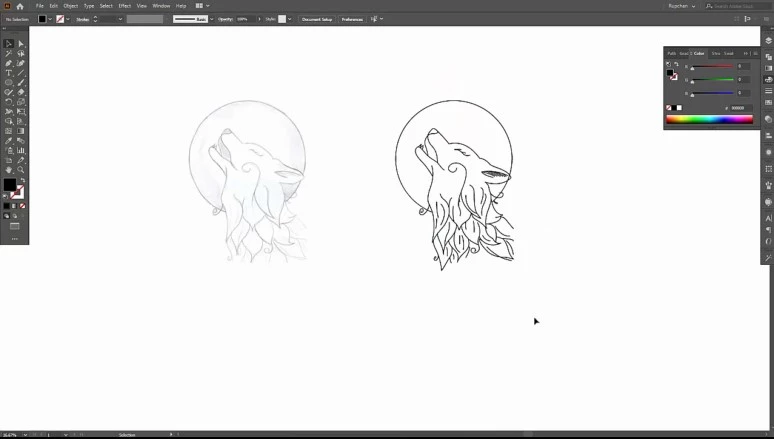
We are reaching the end. Now, separate the drawing path from the previous image. Save the file. It’s now available to export the drawing as needed.
So, our experts reveal their line art drawing hack through a step-by-step tutorial. They are also ready to complete your order. You can choose us undoubtedly. Customer satisfaction is our top priority.
You can also watch the video tutorial – How to Draw Line Art Accurate

