Vector illustration is a cool way to create pictures and designs using computers. But, there’s a secret ingredient called “anchor points” that makes everything work. These points are super important for making awesome designs in vector illustration. When you’re vectorizing an image, it’s like connecting the dots with these anchor points to create something amazing!
Anchor points help us decide where our drawings start, end, and how they look in between. They give us the power to control and shape everything. This content is like a guide to help you understand why these points matter. We’ll share Importance of Anchor Points in Vector Illustration. You will get practical tips so that you can use These points like a pro in a program called Adobe Illustrator. We want to make using anchor points easy and fun. Let’s unlock the secrets to better designs together!
What Is the Anchor Point in Illustrator?
In Illustrator, an anchor point is like a tiny dot that’s really important for drawing. It’s where your lines begin or end. You can think of it as the boss of your drawing, telling the lines where to go and how to curve. These points help you make shapes and designs exactly the way you want. So, an anchor point guides your drawings by directing lines and shapes.
The Significance of Anchor Points in Vector Illustration
Anchor Points help designers in many ways. Here we have described some important Significance of Anchor Points in Vector Illustration:
Shape Precision and Consistency
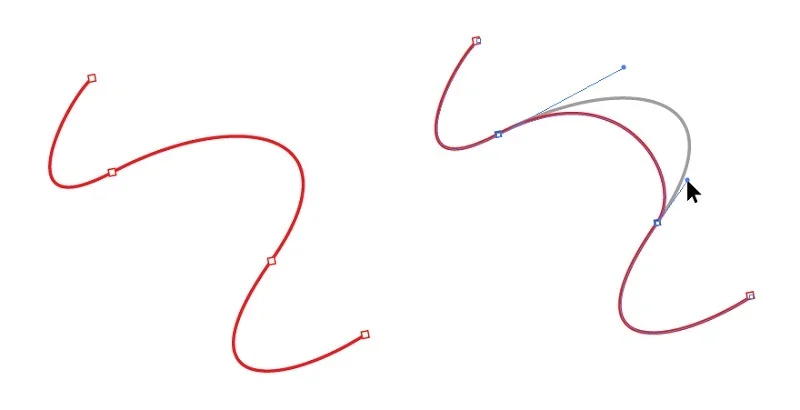
Anchor points are like special markers in drawing. They help artists place things exactly right and control how lines curve. This is crucial for detailed drawings, like logos or icons, where precision matters. These points make it easier to maintain quality and detail in vector illustrations, something that’s hard to achieve with freehand drawing alone. They’re like secret tools for artists to make their drawings look just the way they want them to.
Consistency is vital in design, and anchor points play a key role in achieving it. Designers use anchor points to ensure that similar design elements have the same shapes and sizes. This is especially important in various applications where a standardized look matters. When working on a project with lots of graphics, These points help replicate and modify shapes accurately. This maintains a cohesive and professional appearance across all design elements.
Versatility in Design
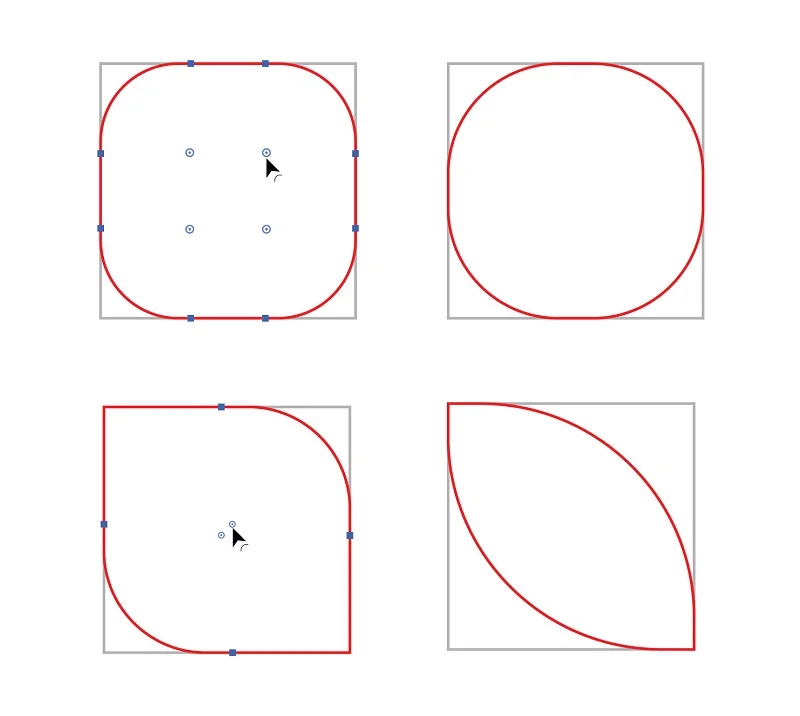
Think of anchor points as magic buttons that help create all kinds of shapes. Designers use them to make simple things like circles or more complicated and cool shapes. It’s like having a toolbox full of options to make different designs.
Being creative means trying new things and having fun. Anchor points let designers do just that. They can twist and turn things to make interesting designs—curvy or pointy, whatever they like. It’s like having a superpower that lets designers be imaginative and come up with cool ideas for their designs.
Smooth Curve Control
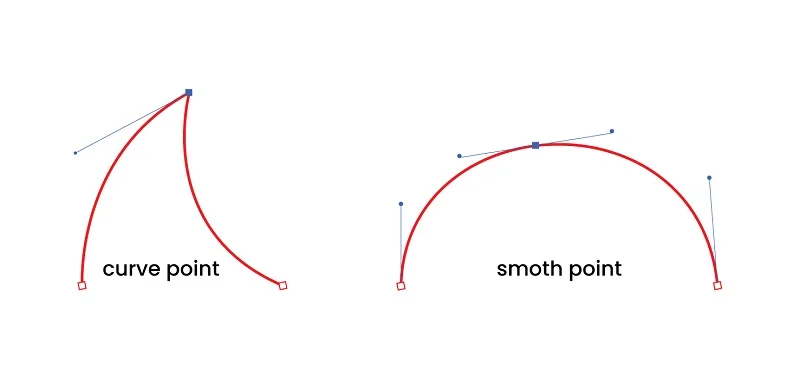
Imagine drawing a line that’s super smooth, like a slide at the playground. Anchor points are like the handles on the slide—you can move them to make the curves just right. It’s like having a steering wheel for drawing smooth lines in your designs.
Designs look better when they look polished and pro. With these points, designers can control how the lines curve, making everything look cool and impressive. It’s like having a secret tool to make your drawings look as awesome as possible.
Efficient Editing and Adaptability
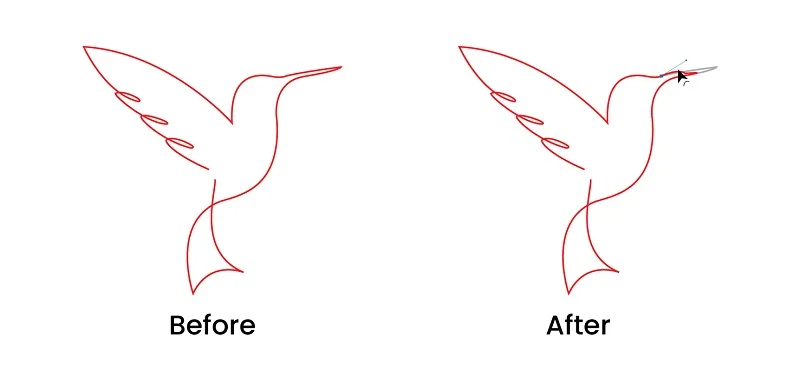
Editing is like fixing or changing things in your design. Anchor points are like magic buttons that make this super easy. They simplify the process, so you can quickly change stuff without any headaches. It’s like having a handy tool to tweak your design whenever you want.
Sometimes, you need to adjust your design in a hurry. Anchor points are like your speedy helpers. They let you make quick changes without messing up the quality. It ensures everything stays top-notch even when you’re in a rush.
Optimized File Sizes
You can shrink the size of your design files through these points. They’re like helpers that pack your designs more efficiently, so they take up less space on your computer. This is useful for saving room.
When you use points, your designs become more organized. This means they take up less space, not just on your computer, but also load faster when you want to open them. It’s like having designs that are quick to open and ready to go.
Precision in Logo Design
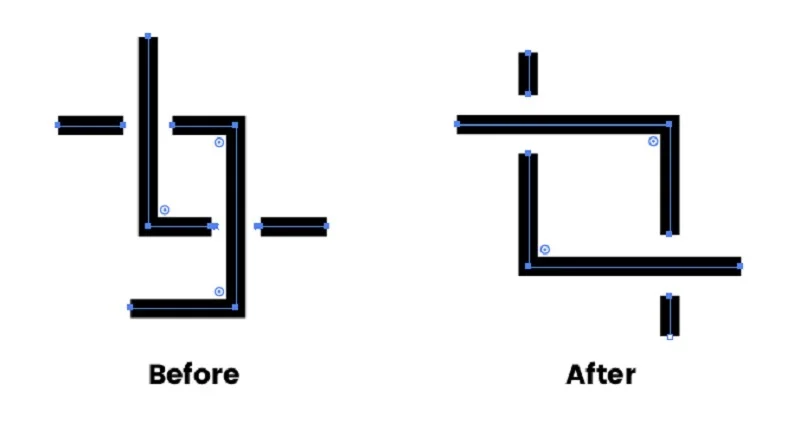
Anchor points are like tiny brushes for logos. They help designers add small and special details to make logos look really cool. It’s like having a special tool to carefully draw the unique things that show what a brand is all about.
Logos need to look just right and super professional. Anchor points help designers do this by paying attention to every little part of the logo. They make sure logos aren’t just pictures but are like special signs that everyone knows. It’s like having a secret trick to make logos look awesome, unique, and grab people’s attention.
Optimization for Printing and Display
Think of anchor points as picture helpers. They’re like magic tools that make pictures super clear and detailed. This is awesome for using pictures in different ways, like printing them on paper or showing them on screens. These points are like your special helpers to make sure your pictures look amazing wherever you put them.
Pictures need to look great, whether on paper or screens. Anchor points are like the superheroes that make sure your pictures work well for both. It’s like having a magical touch that makes your pictures look fantastic, whether you’re printing them or showing them on a computer screen.
You may also read- Types of Illustration
How to Add Anchor Points in Illustrator?
We can easily add anchor points in vector illustration by using the Pen Tool. The processes are given below:
1. Open Adobe Illustrator: Launch Adobe Illustrator on your computer.
2. Create a New Document or Open an Existing One: Start a new document or open the existing project where you want to add anchor points.
3. Select the Pen Tool: In the toolbar on the left side, select the Pen Tool. It looks like a pen or fountain pen icon.
4. Choose the Desired Stroke and Fill: Before drawing, set your stroke and fill preferences. You can choose the stroke color and fill color from the options at the top of the screen.
5. Click to Create the Starting Point: Click once on the canvas to create the starting point of your shape or path.
6. Create Additional Anchor Points: To add more points, move your cursor to where you want the next one. Click again to add a new anchor point. Illustrator will automatically connect this point to the previous one with a straight line.
7. Adjust Handles for Curves (Optional): If you want to create curved lines, click and drag when placing an anchor point. This action creates direction handles that you can adjust to control the curve.
8. Continue Adding Anchor Points: Repeat the process, clicking to add anchor points along the desired path. Connect the last anchor point to the first one to close the shape if needed.
9. Save Your Work: After adding and adjusting points, save your Illustrator file to keep the changes.
How to Reduce Anchor Points in Illustrator?
Here’s a step-by-step guide on how to reduce anchor points in vector illustration using the Delete Anchor Point Tool:
1. Open Adobe Illustrator: Launch Adobe Illustrator on your computer.
2. Open or Create a Document: Open the Illustrator file you want to modify. If it’s not available, create a new document.
3. Select the Delete Anchor Point Tool: Click the “Pen” tool in the toolbar on the left, then hold and pick “Delete Anchor Point Tool” from the menu that appears.
4. Choose the Path to Simplify: Find the line or shape with lots of dots. We want to make it simpler, so let’s focus on that one.
5. Select the Delete Anchor Point Tool: Choose the path you want to change using the Delete Anchor Point Tool. This will highlight the anchor points.
6. Click on Unnecessary Anchor Points: With the Delete Anchor Point Tool selected, click on the anchor points you want to remove. Illustrator will adjust the path accordingly.
7. Review the Modified Path: After deleting points, review the modified path to ensure it maintains the shape you want.
8. Adjust as Needed: If necessary, use the Direct Selection Tool (white arrow) to adjust the position of remaining anchor points. This helps in fine-tuning the shape.
9. Save Your Work: Save your Illustrator file to preserve the changes.
How to move anchor point?
Direct Selection Tool helps to move anchor points in illustrator. Here we have discussed the necessary guidance:
1. Start Adobe Illustrator: Open Adobe Illustrator on your computer.
2. Open or Make a New File: If you have a file, open it. If not, create a new document in Illustrator.
3. Pick the Direct Selection Tool: Click on the “Selection” tool or press “A” for the Direct Selection Tool (white arrow).
4. Choose the Path with the Anchor Point: Click on the path containing the anchor point you want to move. The anchor point should become visible.
5.Click on the Anchor Point: Use the Direct Selection Tool to click directly on the anchor point you want to move. This selects the anchor point.
6. Drag the Anchor Point: Click and drag the selected anchor point to where you want it. Illustrator will adjust the path accordingly.
7. Release the Mouse Button: Let go of the mouse button. This action sets the anchor point in its new position.
8. Review the Modified Path: Check the path after moving the point to ensure it fits your design needs.
9. Adjust Handles (If Necessary): If the path has curves, you may need to adjust the direction handles associated with the anchor point for precise control. Click and drag the handles as needed.
10. Save Your Work: Save your Illustrator file to keep the changes.
Conclusion
Anchor points in vector illustration are like the superheroes of drawing. They help make shapes just right, whether it’s a logo or a cool design. They’re essential for detailed work. Don’t hesitate to experiment with anchor points. These are your buddies in drawing. They make sure everything looks sharp and cool. So, keep experimenting and enjoy the journey of creating amazing things with anchor points in your designs!
FAQs
Q1: What are anchor points in vector illustration?
A: Anchor points are points in a design that define its shape. They guide the paths and curves of vector graphics.
Q2: Why are anchor points important in vector illustration?
A: Anchor points are crucial for precision and consistency in shaping objects. They ensure accuracy and play a key role in various design aspects.
Q3: How do anchor points contribute to design consistency?
A: Anchor points maintain consistency by ensuring uniform shapes and proportions in design elements, crucial for branding and graphics.
Q5: How can I reduce anchor points in a design?
A: To reduce anchor points, use the “Delete Anchor Point Tool” or the “Simplify” function in Adobe Illustrator. This streamlines paths without compromising shape.
Q5: Are anchor points necessary for all types of designs?
A: Yes, anchor points are versatile and beneficial for various designs, from logos to illustrations. They ensure professional-looking results in different applications.

