A badge is the most popular usage of a logo. Organizations, as well as institutions, often use it with compulsory practice. So, the quality of the badge logo is mandatory. To confirm the distortion-free quality badge logo, we need to create a vector format for it.
Here, we made a tutorial blog for you. Let’s explore- how to create a colorful badge logo. We use the most prominent designing software Adobe Illustrator CC.
Step 1: Open a badge logo on the Artboard
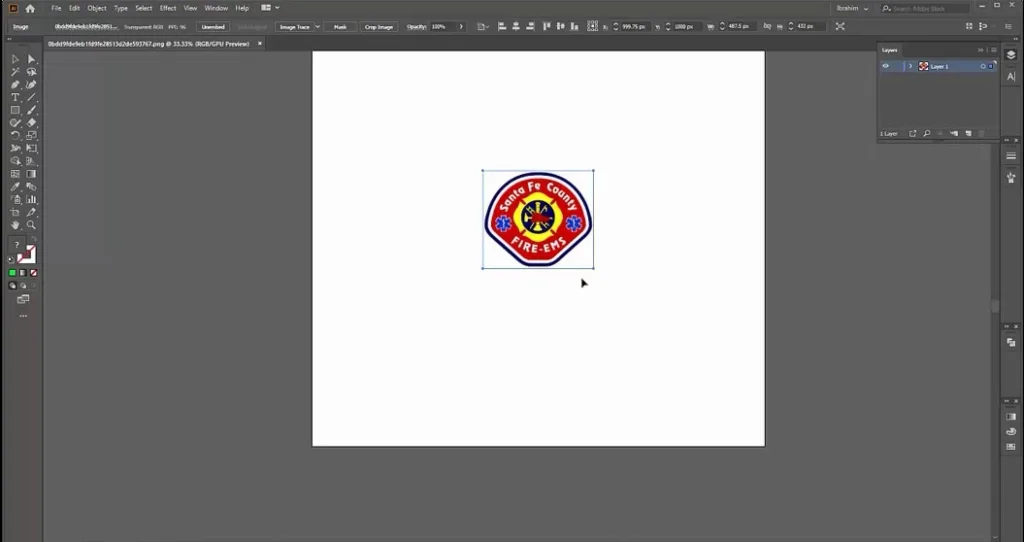
In the beginning, select a badge logo. Open it on the artboard of Adobe Illustrator CC.
Step 2: Customize Layer and Stroke
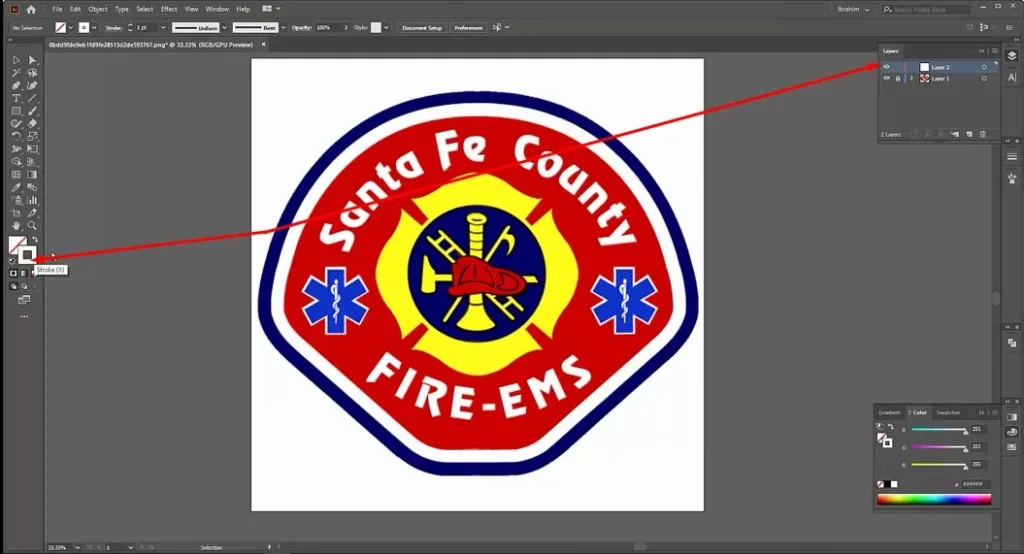
Before starting the path drawing we need to customize the Layer and stroke. Create a new layer and lock the existing layer. Also, lock the fill color and enable stroke.
Step 3: Start with the Ellipse Tool
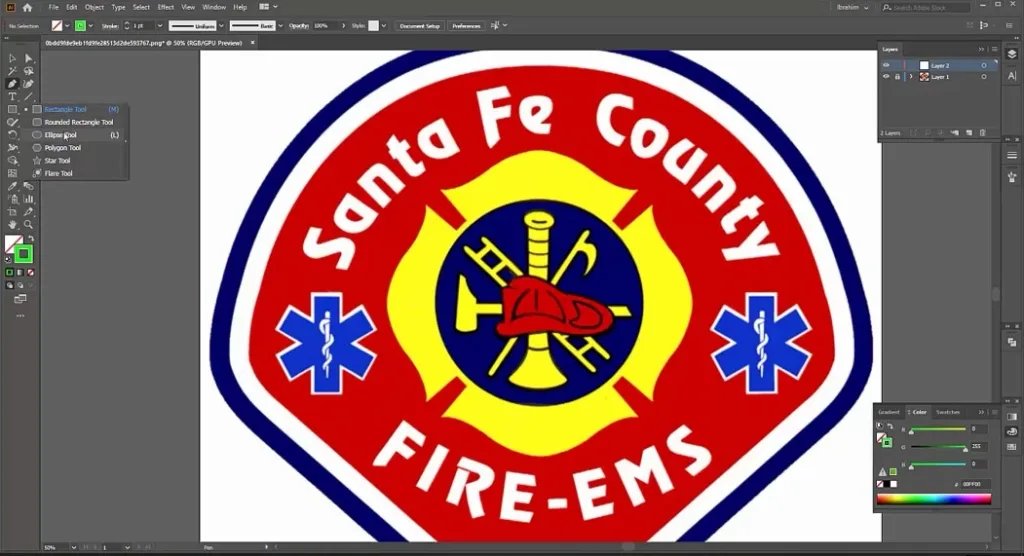
Now, we work with the Ellipse Tool for drawing the various rounded and rectangular shapes.
Step 4: Use the Pen Tool
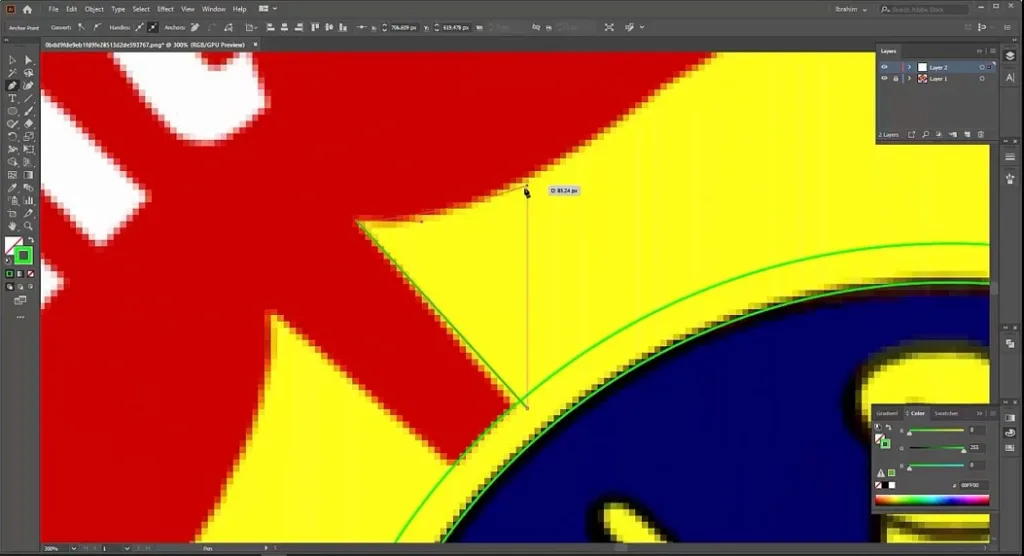
It’s time to use the most useful tool for drawing the path. We use Pen Tool here. We can select the tool manually or by pressing ‘P’. It may take several times. So don’t be in a hurry and keep patience.
Step 5: Work with Type on A Path Tool
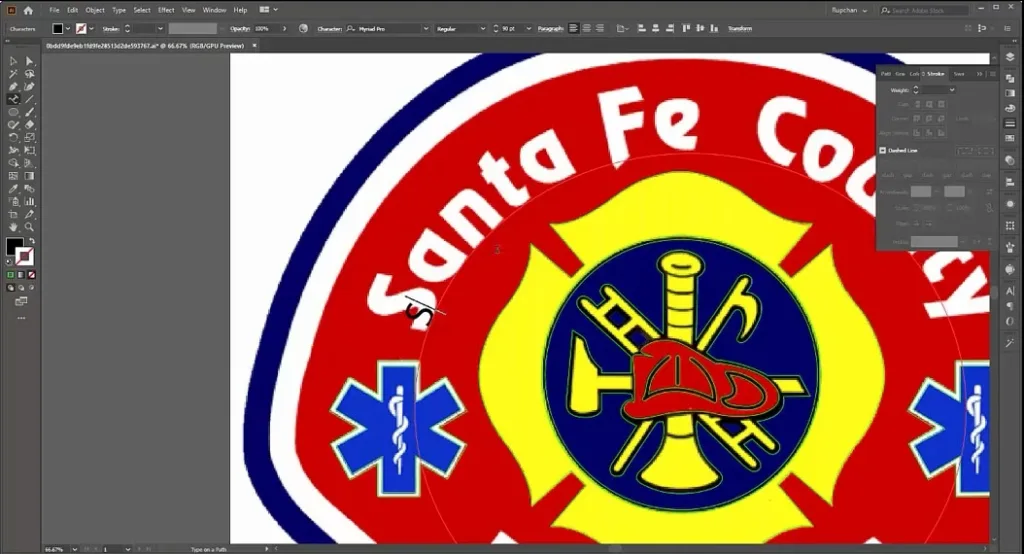
The badge logo we selected, has text. We select Type on A Path Tool for typing the text.
Step 6: Colorize the Path
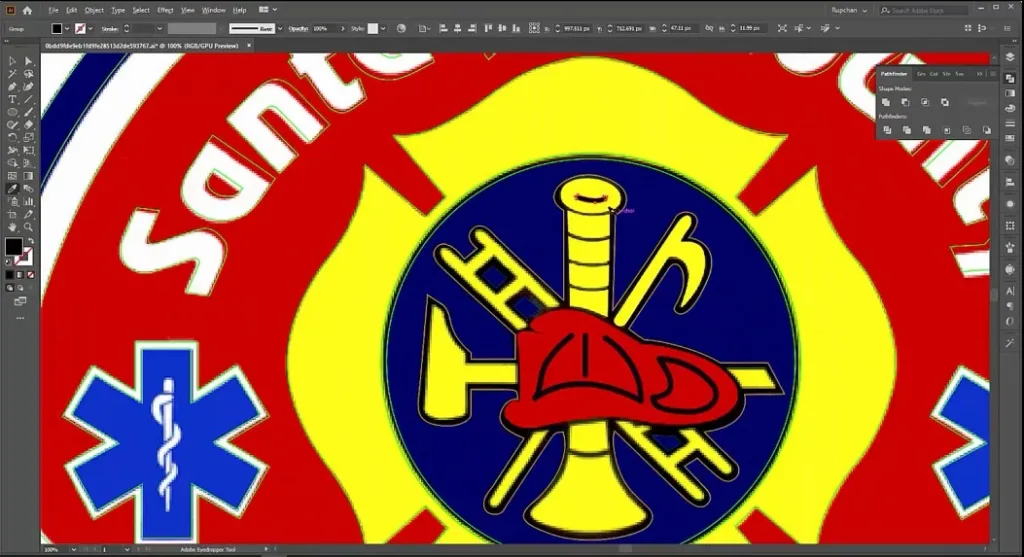
After completing the path drawing, we color it with the Eyedropper Tool. Pick the color from the previous file and input it into the new one.
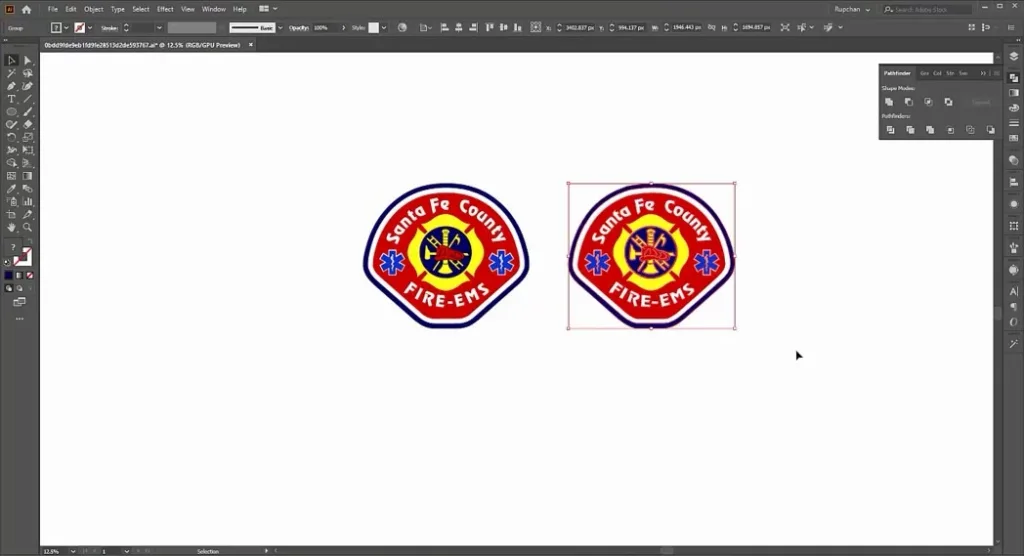
Step 7: FInish the process
You may also read– Logo Design Process From Start To Finish.
Finally, we reach the end of the process. Save the work and don’t forget to expand it. Export the badge logo in the needed file format.
We tried to make the tutorial as easy as possible. Now you can easily justify the quality of a badge logo. And if you need the service, send us your work order. Our experienced professionals give you the best vector conversion service.
You can watch the video tutorial – How to Create A Colorful Badge

